DIY Camera Rain Cover
contents
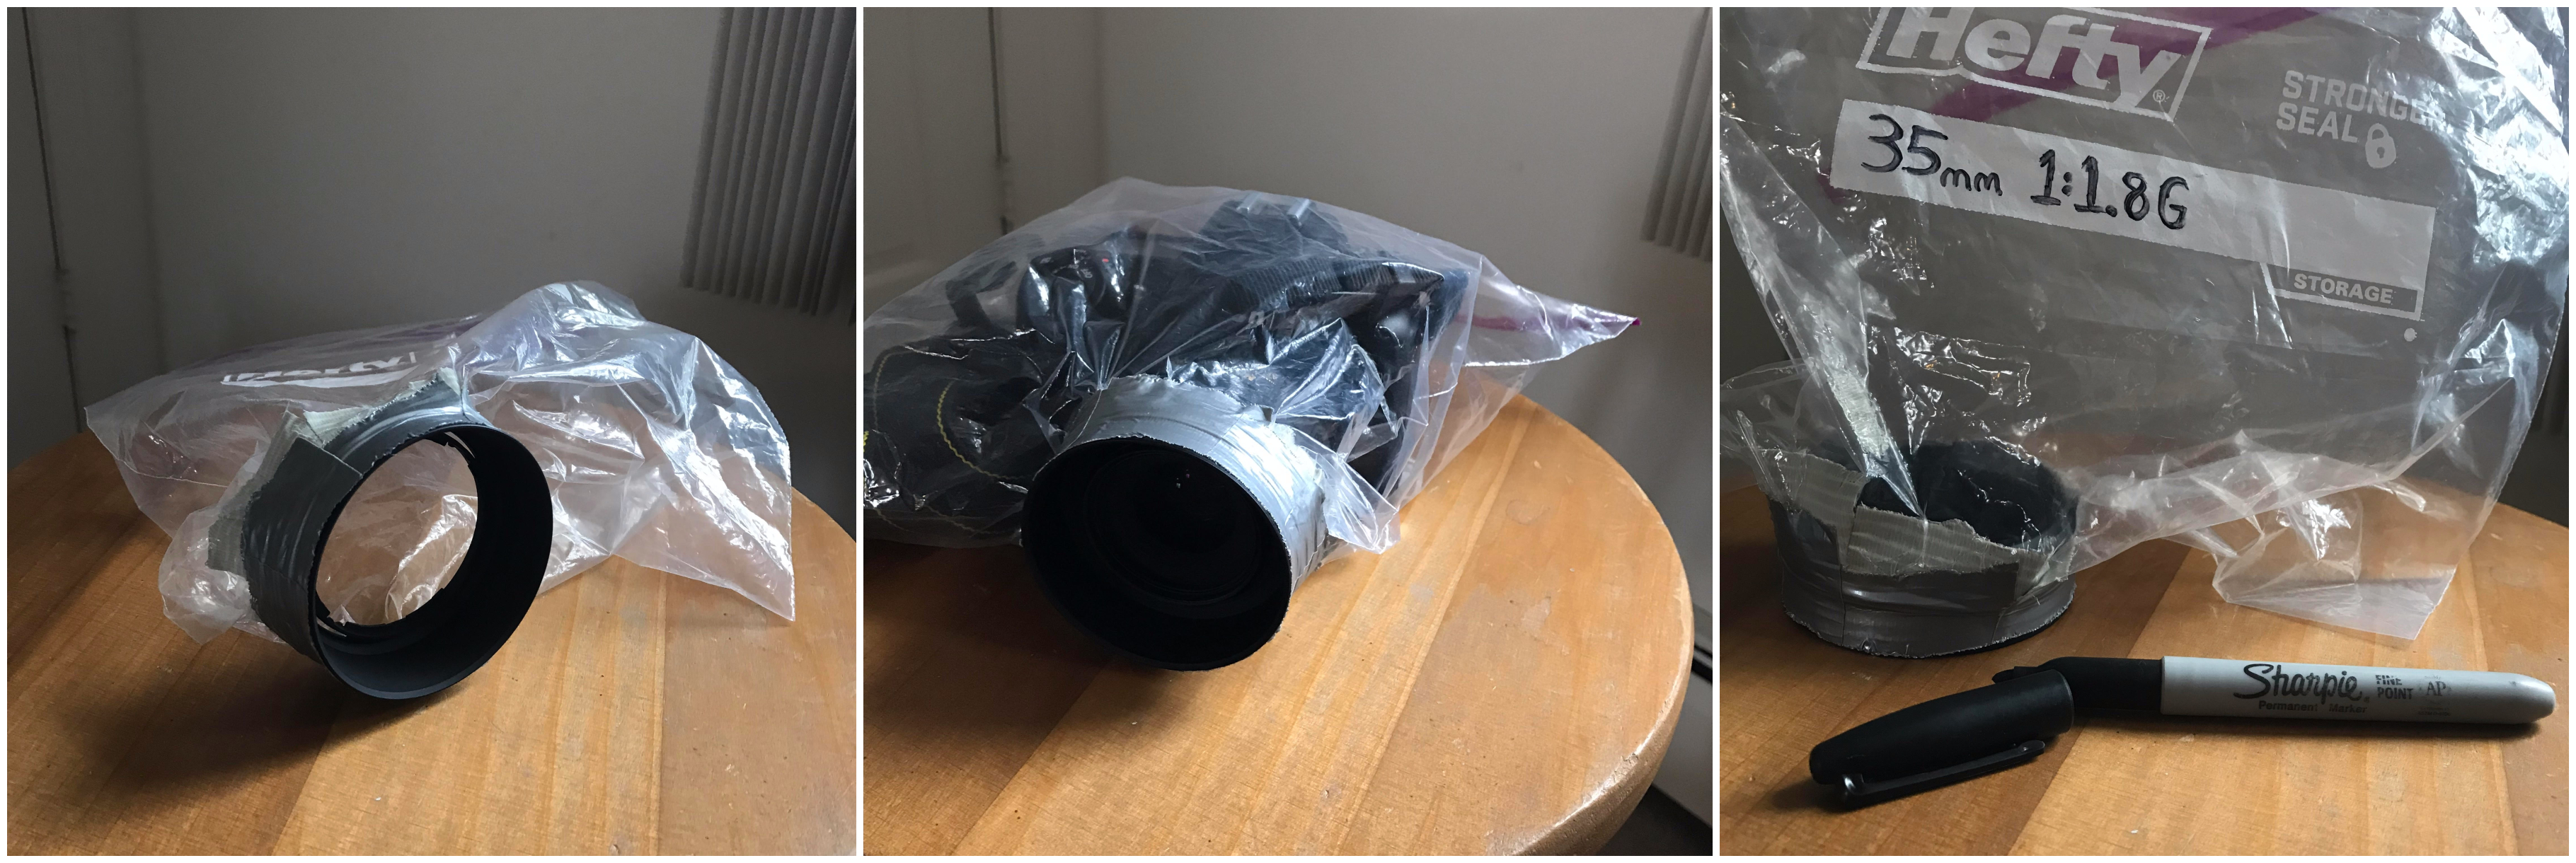
I’m going to show you how I made little snap-on rain covers for my camera.

The basic idea here is to use lens hoods to secure a kitchen bag over the camera.
Before we get to how (which isn’t very complicated) I have a little to say about why. You can just skip to how if you like.
🔗 Motivation
For some, living away from their hometown is escape. Escape, for example, from habitually cooking box mac-and-cheese on a shockingly dysfunctional trailer home electric cook top in Tennessee. I live away from my hometown. The word I would use, though, is exile.
I could talk your ear off over a whole litany — Corvallis took third place in livability.com’s ~renowned~ straight-to-chamber-of-commerce-press-release “Best Places to Live 2018” rankings — of topics — seriously, I dare you to ask me about vote-by-mail. However, I prize especially green space in Corvallis. Immediately to the north — as in, contiguous with a city park — is Oregon State University’s McDonald Forest. The University forest covers 17.6 square miles. Parks and Rec and the Greenbelt Land Trust administer about 3.6 square miles around town. That’s 21.2 square miles total of publicly accessible green space that’s pretty much as easy to get to as swinging by the post office. This figure neglects entirely the Oregon State campus, dairy farm, sheep farm, llama farm, horse farm, poultry farm, and vegetable farm in addition to several very nice privately-held farms, particularly around Crescent Valley high school. For comparison, Corvallis’s city limits bound 14.3 square miles.
These very old and very Instagram-filtered shots tell a nice synopsis.
So, basically, green space almost anywhere else compares like absentee voting to vote-by-mail. Sure, it’s nice, but why should I have to print out and mail in an extra bullshit form, which requires some forethought, instead of just automatically getting a ballot in the mail when it’s time to vote? (Also, where’s my official voter’s guide with brief, straight-from-the-horse’s-mouth candidate statements and Citizen Initiative Review summaries of ballot measures written a panel of impartial fellow voters wrangled from around the State. Like, what the fuck?) P.S., you don’t even need a stamp to vote by mail.
A composite NASA image earlier today showing a solid swath of moisture stretching from coastal China to western British Columbia. #wawx pic.twitter.com/Lv2MPnlUAt
— NWS Seattle (@NWSSeattle) October 16, 2017
In the northwest, being out means being out in the rain. I haven’t quite put my finger on what being out in the rain in Corvallis means. I suspect it’s different from the Midwest, where being out in the rain means you have to hang your pants up in the shower when you get home. I think it has something to do with the character of precipitation from loose, low-elevation clouds. I think it has something to do with the particular temperate rain forest flora and geology. I think it has something to do with high school, cross country, and the privilege to drive. I think it has something to do with how it doesn’t just blow through. I think it has something to do with being out alone, just as an errand. I think it has something to do with my own absences — especially during the wet parts of the year in the fall, winter, and spring. I think it has something to do with watching weather over Vineyard mountain from town.
I haven’t really gone after (or shot incidentally) the rain in Corvallis. I went back through my photo archive, looking for what I had shot of rain. It’s not much.
I took the first photo parked late at night at Neogen in Lansing. I took the second with an iPhone, crawling around in a Tacoma parking lot. It was raining harder than it looks.
Neither of these photos tell the particular aspect of rain I’m after. I don’t think there’s necessarily a physical barrier to capturing that aspect outside of Corvallis, but I’m not sure that I could recognize and align the elements as necessary elsewhere. I’m not settled on what subject, point of view, or conditions I’m after, but I’m already thinking about possibilities. I suspect that if I do get what I want, it will come around by just being out outside town in the rain with my camera.
So, long story short, this project materialized out of a latent photographic ambition that, for now, is locked in a holding pattern.
I might not actually need a DIY rain cover. I do tend to reflexively try to solve problems with stuff. (You know, problems like not living in Corvallis.)
You might not need this. (See alternatives.)
🔗 Design Objectives
A good indicator of whether something is useful is whether you use it. So, I did some thinking about what would make me more likely to actually use a rain-protective item.
-
easy and quick to securely put on and take off
- i.e., not fiddly!
- something I don’t care about wearing out
- I’m happy to just refit the lens hood with a new plastic bag
- but not something that’s disposable and I’d have to go out of my way to replace
- because then I just won’t use it
- doesn’t depend on a tripod
- I’m not a good tripod person
I’m not looking for something to handle with unexpected weather, but for something to throw in the bag when I expect weather. So, light/small enough to keep in my bag by default isn’t a requirement.
🔗 Alternatives
These range from nearly identical…
… through similar, but not quite the same…
- tape the bag a filter instead of a lens hood
- cut a hole and attach a bag with a rubber band on an as- needed
- re-purpose rain trousers, attach to lens hood with velcro
- purpose-built disposable cinch-cord rain sleeves
… to completely different directions.
- use a weather-sealed camera and lens

- if you have one, pull out your (waterproof?) iPhone
- buy a cheap waterproof and/or throwaway point-and-shoot
- just use an umbrella (maybe if you’re a good tripod person?)
- carry a trash bag to serve as an emergency you-and-backpack poncho… in a really wet pinch, keep the camera safely tucked away
- finally, just go for it
- abuse doesn’t necessarily mean lost function
- if (functional) damage occurs, repair shops/new cameras exist
- you probably objectively over-value your gear due to the endowment effect
- don’t let something completely rectifiable prevent you from going after what you want to get
- personally, though, I am quite accomplished at breaking things
🔗 Supplies

You’ll need:
- a compatible lens hood (this is lens-specific)
- a big kitchen zip bag
- duct tape
- scissors
- a pen
I use a crop frame (DX) camera (specifically, a Nikon D7500). A Hefty 1 gallon bag works well for me. If you have a bigger camera (e.g., full frame), you might need a bigger bag. I’ve seen kitchen zip bags available with up to 2.5 gallon volumes.
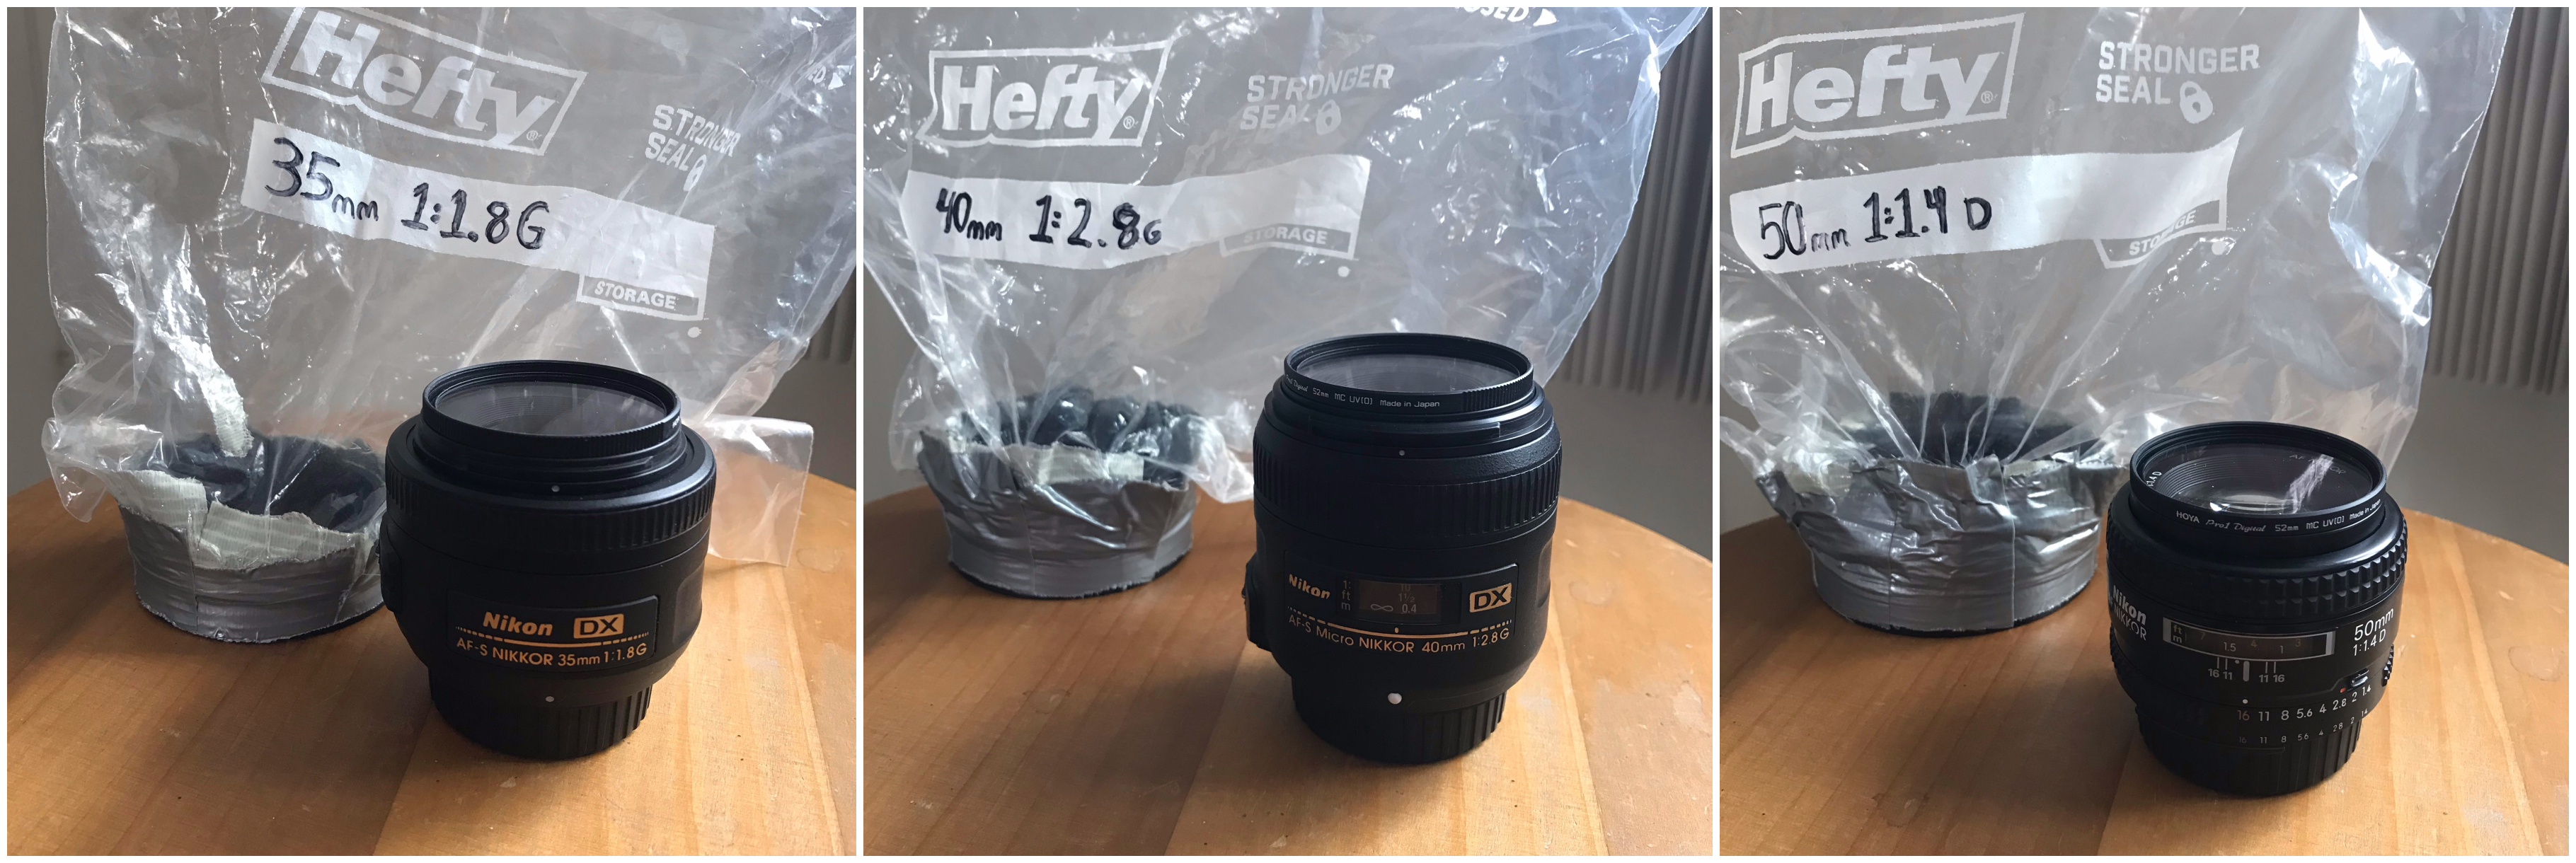
Because this project is lens specific, you’ll need to think about which lenses you want to be able to outfit with rain covers. I decided on just my primes lenses because I figured, with autofocus, using them in the bag wouldn’t be too bad. Plus, they’re what I figure I’d probably reach for to shoot to subject matter in a wet situation, anyways.
You could probably do fine with a zoom lens, though, although you might need a bigger bag and adjusting focal length in the bag might be annoying.
You might have free lens hoods sitting around at home, if you don’t regularly care to use them. If you don’t, pop onto eBay. You can often find lens hoods for super cheap… maybe around $5 with free shipping. Of course, these arrive in freight class from East Asia, so you’ll have to hurry up and wait a few weeks. If you do have lens hoods, maybe you can make do without lens hoods for a few weeks while replacements for your duct-taped hoods ship in.
While you’re on eBay, you might as well pick up some replacement lens caps, too. That way, when yours inevitably disappear (or, more relevantly for me, when you check and swear they’re not in your pockets but then 10 minutes later you find them in your pocket) it’s no big deal. Buying these cheap (with 1 month shipping) saves a ton relative to trying to pick them up in a pinch, even on Amazon.
🔗 Trace & Cut

You’ll want to trace the lens hood circumference onto the very bottom of your kitchen bag (e.g., where the flat face of the front folds over to become the flat face of the back). Trace on the left side (so there’s room to the right for the camera body) and with the label facing down (that way it won’t be on top of the camera, blocking the viewfinder and/or screen).
I’ve tried this two ways: holding the hood inside the plastic bag and then tracing over it and placing the hood on the plastic bag then. I found that putting lens hood inside the bag to trace it was a little less fiddly than trying to flatten out the end of the bag, placing the hood over it, and then tracing the lens hood directly.
If you’re a habitual tripod person, perhaps consider putting the hole along one of the flat sides of the kitchen bag instead of the bottom. This way, the open end of the bag will slide as nicely as possible over the tripod mount.
Cut your hole out, leaving about 1 cm of material inside the traced line. This makes the fit over the lens cap nice and taught.
🔗 Tape

Secure the lens hood on your camera. Then, put the camera in the bag and ease the lens hood through your hole. Position the hood so that the lip is about half covered by the bag. Adjust the hole (red) so that the flat face of the bag (blue) is parallel to the top of your camera. Then, tear duct tape strips maybe a little less than an inch wide and secure the bag to the uncovered half of the lens hood lip. I found that placing strips so that the width of the roll was parallel to the curvature of the hood worked well. Work your way around the lens hood, smoothing out wrinkles and pressing the tape securely into place. Once you have the first few strips in place, you can continue with the lens hood removed from the camera.
Then, flip the bag inside-out over the hood and secure the other side of the lens hood lip to the plastic bag, using the same technique.
🔗 Finished!

Bonus points ![]() : label the bag so you know which lens the taped-in hood corresponds to.
: label the bag so you know which lens the taped-in hood corresponds to.

🔗 Use!

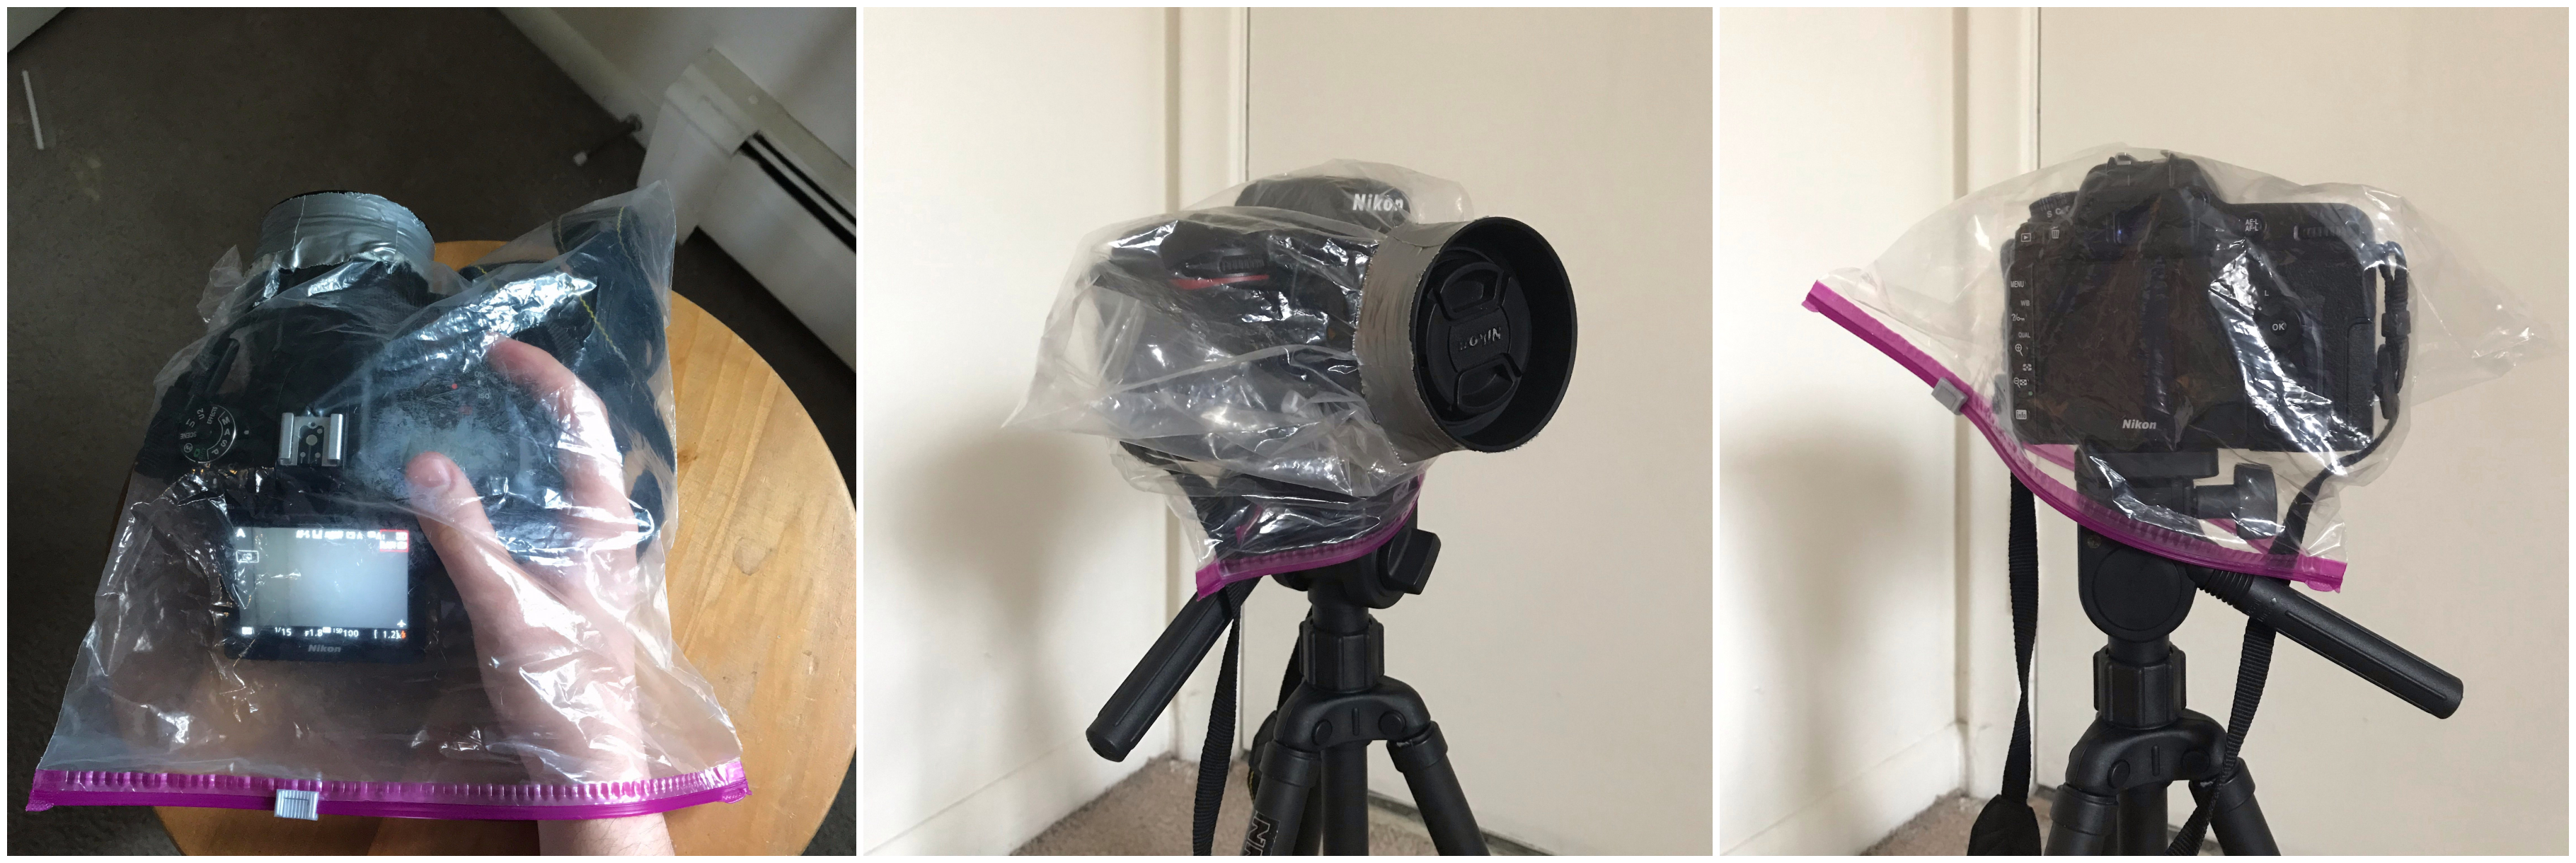
I found that my touch-sensitive rear display picked up input just fine through the bag. Looking through the viewfinder with the bag on isn’t too bad, either.
The shutter release and other controls are manageable from outside the bag, but a little annoying. I prefer to have my hand in the bag. With the Hefty bags, at least, the zipper zips the right way (towards the hand). I’m pretty sure it would be the same with other types of bags.
Everything fits fine on a tripod!
🔗 Let’s Chat
I started a twitter thread (right below) so we can chat ![]()
![]()
![]()
new on my blog: a little DIY instructable for a DSLR rain cover 🌧️📷
— Matthew Andres Moreno (@mmore500) November 12, 2018
i.e., a plastic kitchen bag (cleverly?) duct taped to a lens hoodhttps://t.co/dkKVU73uzS pic.twitter.com/XtES6RL9Ed
Pop on there and drop me a line ![]() , make a comment
, make a comment ![]() , leave your own camera protection tips & tricks
, leave your own camera protection tips & tricks ![]() , or share your favorite rain pictures
, or share your favorite rain pictures ![]()