My Photography Workflow
contents
🔗 Overview
I like taking pictures.
Photography is hard enough work, even without logistical considerations. Over the past few months, I’ve assembled piece-by-piece a set of tools and processes that seem to work for me.
Here are a few pieces of information I thought were worth sharing… or at least preserving so I can refer to them easily. Enjoy!
🔗 What’s in my Camera Bag?
In no particular order,
- Peak Design backpack
- Nikon D7500 (love the flippy screen!)
- Peak Design capture clip and lens kit
- iPad pro
- apple pencil
- Lenovo X1 Carbon (running elementary OS)
- some lenses
- macro,
- 35mm prime, and
- telephoto
- kept in Neoprene sleeves with UV filters for protection
- outdoor research lost coast fingerless mitts
- my MSU beanie
- a few Dry & Dry silica desiccant packets
- kept in a ziploc bag just in case the camera gets wet
- Hefty Gallon bag
- to protect the camera in case it’s extra wet out
- to prevent condensation in the camera when I’m coming in from the cold
- two extra camera batteries
- papermate flair pen
- toothbrush (to brush dirt off the camera)
- Nikon Pre-Moistened Lens Cleaning Wipes (disposable)
- microfiber lens wipes
- pocketknife
- extra SD cards
- protip: look for these like-new used on Amazon to save $$
- chapstick
- lightning to USB adapter
- usb splitter
- 32 gb usb drive
- business cards (never know when you’ll need these)
- wallet (with tile)
- Blackberry Q10
- BlackBerry Extra Battery Charger Bundle for BlackBerry Q10
- spare Apple earpods
🔗 Other Accessories
- replacement lens caps (front and back)
- Buying these for super cheap ahead of time with three week shipping beats paying 10x as much when you eventually misplace a lens cap.
- air blower and other cleaning accessories
- a big bag of Dry & Dry silica gel desiccant
- umbrella
- my dad’s old tripod
- Meijer insulated bag
- to reduce thermal shock to camera when bringing it in from the cold
- IRIS Weathertight Storage Box, 19 Quart - Clear
- Neewer Flexible Partition Camera Padded Bag Insert Protection Handbag
- this camera bag fits nicely in the IRIS box
🔗 SD Backup
I don’t want to lose more than a day’s worth of photos to a SD card failure. So, every night I make a backup of my SD card.
Dmitri Popov’s Little Backup Box makes this easy and doesn’t break the bank. His clever idea is to use a Raspberry Pi as a single-purpose backup machine. You boot the Pi, stick in a thumb drive and your SD card, and then go do something else for a few minutes while it syncs your new images over to the thumb drive. This is all accomplished with some clever bash scripting.
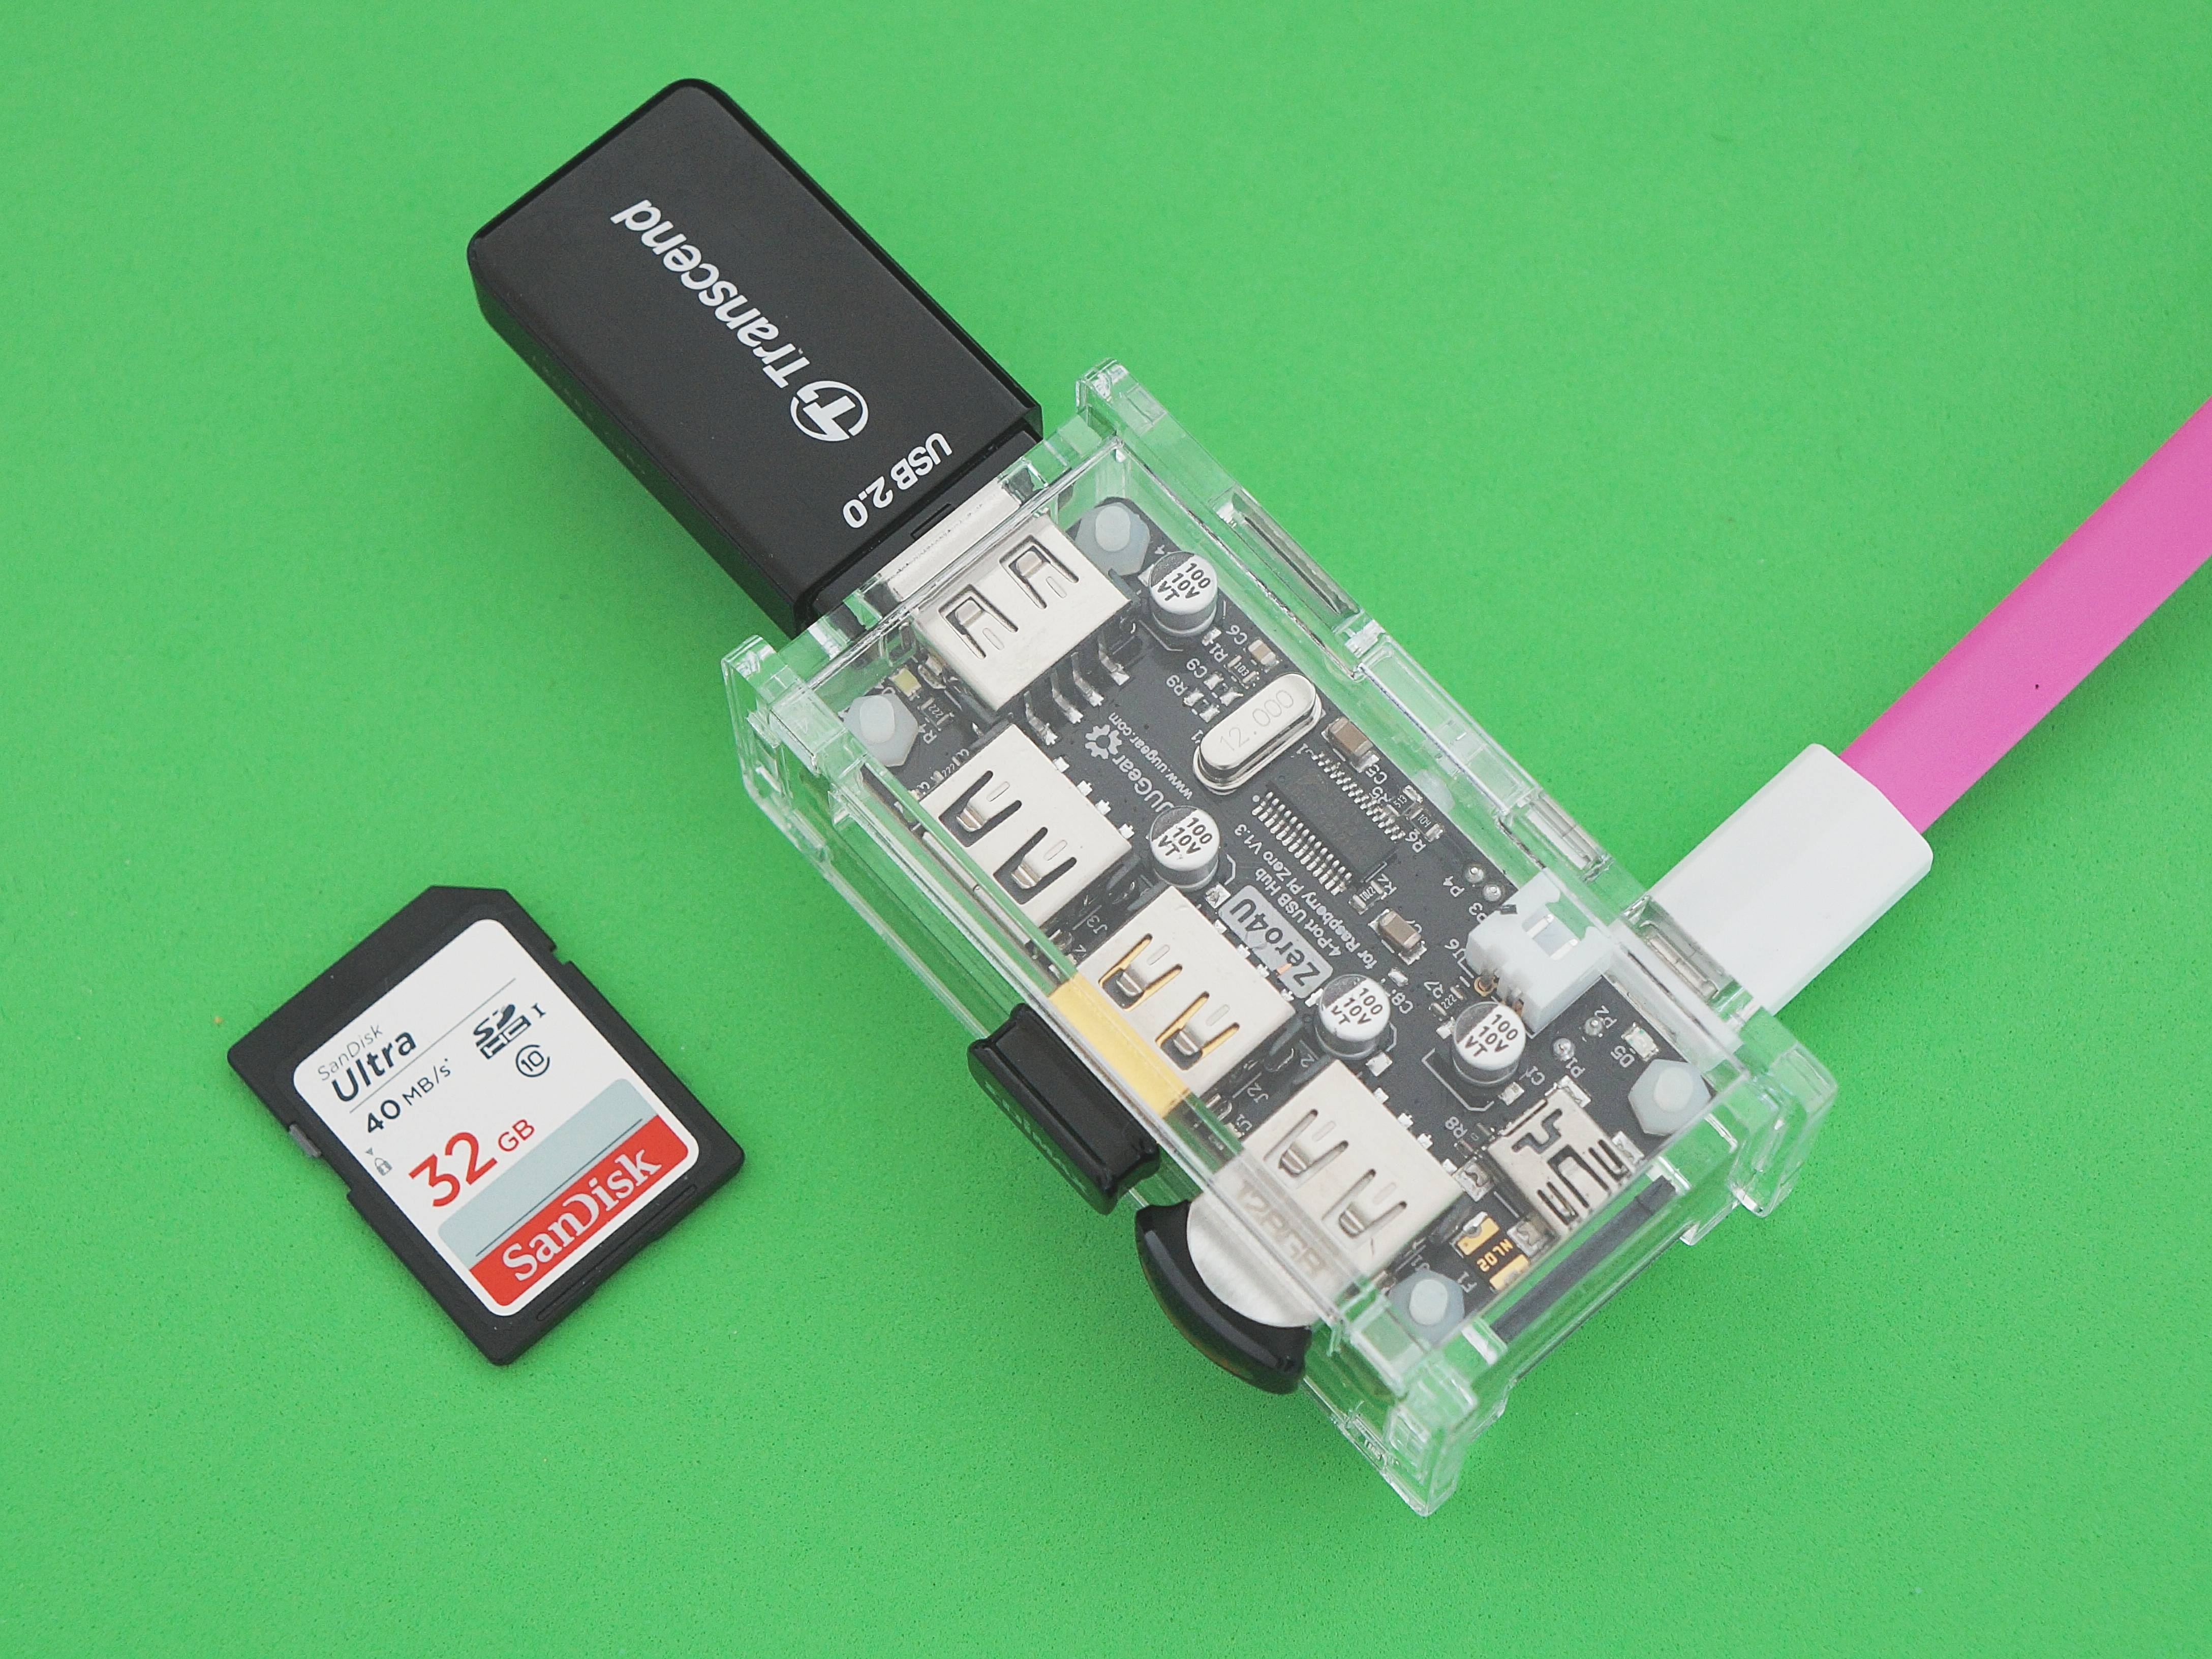
Isn’t it cute?
You can find the software and installation instructions here. You’ll need to buy some hardware. Here’s what I use:
- Raspberry Pi Zero v1.3
- Zero4U USB hub for Raspberry Pi Zero from UUGear
- Clear Acrylic Case For ZERO4U And Raspberry Pi Zero (V1.2 OR V1.3)
- Transcend USB card reader
- BlickStick Nano (optional but handy for basic visual feedback)
- SanDisk Ultra Fit 128GB USB drive (provides enough storage for backing up RAW * files and photos on the move)
- JBtek Raspberry Pi Micro USB Cable with ON / OFF Switch
More on the hardware here. The visual feedback provided by the BlinkStick makes it much, much easier to use the Little Backup Box. I had a bit of a hard time figuring out how to actually make use of it until I came upon an obscure how-to (also by Dmitri Popov) in Linux Magazine Issue 185/2016. I’ve pasted in the relevant bits below:
🔗 Add Some Blink
The scripts are designed to run automatically: Boot up the Raspberry Pi and plug in the storage device and the card reader or camera, and the scripts take care of the rest. That’s fine, but it would be even better if you had some sort of visual feedback. You can add a simple LED circuit to the Raspberry Pi and modify the scripts to use the LED for notifications (e.g., continuous light when the script is running, three blinks when a storage device is mounted, etc.); however, an LED and resistor dangling out of the Raspberry Pi is neither convenient nor practical.
BlinkStick Nano provides a much more elegant and flexible solution. This tiny device features two multicolor LEDs, and it plugs directly into a USB port. Better still, BlinkStick Nano can be controlled from the command line, so you can easily integrate it into the scripts. > To enable BlinkStick Nano, install the blinkstick package using PIP:
sudo apt-get update && sudo apt-get install python-pip
sudo pip install blinkstick
To make BlinkStick Nano blink, use the
blinkstickcommand with the--repeats(number of blinks) and--blinkoption followed by the LED color. The command below, for example, makes BlinkStick Nano blink green three times:blinkstick --repeats 3 --blink greenYou can also use the
--index 1option to use the second LED:blinkstick index 1 --repeats 3 --blink yellowNow, all you have to do is strategically place the appropriate blinkstick commands in each script. For example, adding
blinkstick --repeats 3 --blink greenin the beginning of the script will notify you when the script is up and running.
🔗 Convert
I convert my RAW files to .DNG as soon as they come off my camera.
This will hopefully make them more future-proof.
Plus, .DNG plays nicer with many of my other software tools than Nikon’s proprietary .NEF.
I use Adobe’s DNG Converter tool (running via Wine) to perform the conversion.
Photos I take just ‘cause (“assignments from within”) come off my camera once a month.
My file-naming convention for these images is: 2017-11-MAM-######.dng.
Pictures I take for other people (“assignments from without”) come off much sooner.
My file-naming convention for these images is: 2017-11-24-last_first-MAM-######.dng.
(Note that I include my initials MAM in the file names.)
I start raw photo numbering at 0 (i.e., 000000) and edited photo numbering at 100000.
🔗 Cull
Culling my images is just the worst. It takes way too long and is exhausting. Right now, I use DarkTable Hopefully, my suffering will decrease when I get better at using DarkTable or find a better tool.
Update:
I have found it much more pleasant to load unculled photos onto the iPad in my camera’s native RAW format (.NEF) and perform my cull there.
Then, I transfer the good photos from the iPad to my laptop via ifuse/libimobledevice.
It was a bit difficult getting ifuse set up, but I found this gist extremely useful.
Now, assuming the directory ~/mnt exists, I use the following commands to mount the iPad to my filesystem.
idevicepair pair
ifuse ~/mnt
Then, I can access my culled photos directly, copy them over, convert them to .DNG, and proceed with my archiving workflow on my laptop.
To unmount the iPad, use
fusermount -u ~/mnt
🔗 Archive
I archive my personal photos on a monthly basis. I archive other photos on a project-by-project basis.
I keep a separate archive of all my unedited RAW files that survive the cull and — for projects — my edited products. To illustrate, my personal photos are sorted into the following archive structure:
- 2018-01-raw
- 2017-12-raw
- 2017-11-raw
- 2017-10-raw
- etc.
My projects are stored in the following archive structure:
- 2017-11-24-last_first-raw
- 2017-11-24-last_first-edit
Update: Here is the shell command I use to rename my edited files. I start numbering raw files at 0 and edited files at 100000.
i=100000; for f in *.JPG; do mv $f 2018-09-MAM-$(printf "%06d" $i).jpg; let "i++"; done
🔗 README.md
I use templ to populate each archive with a descriptive README.md.
# {year}-{month:02d}-{day:02d}-{client-last:l}_{client-first:l}-{raw-or-edit}

{month:02d}-{day:02d}-{year}

{location}

{client-first:c} {client-last:c}

## description
{description}

## Contact
{cur-author}

email: [{cur-author-email}](mailto:{cur-author-email})

phone: {cur-author-phone}

web: [{cur-author-website}]({cur-author-website})

generated {cur-month:02d}-{cur-day:02d}-{cur-year}
🔗 Contact Sheet
I also keep a contact sheet in each archive.
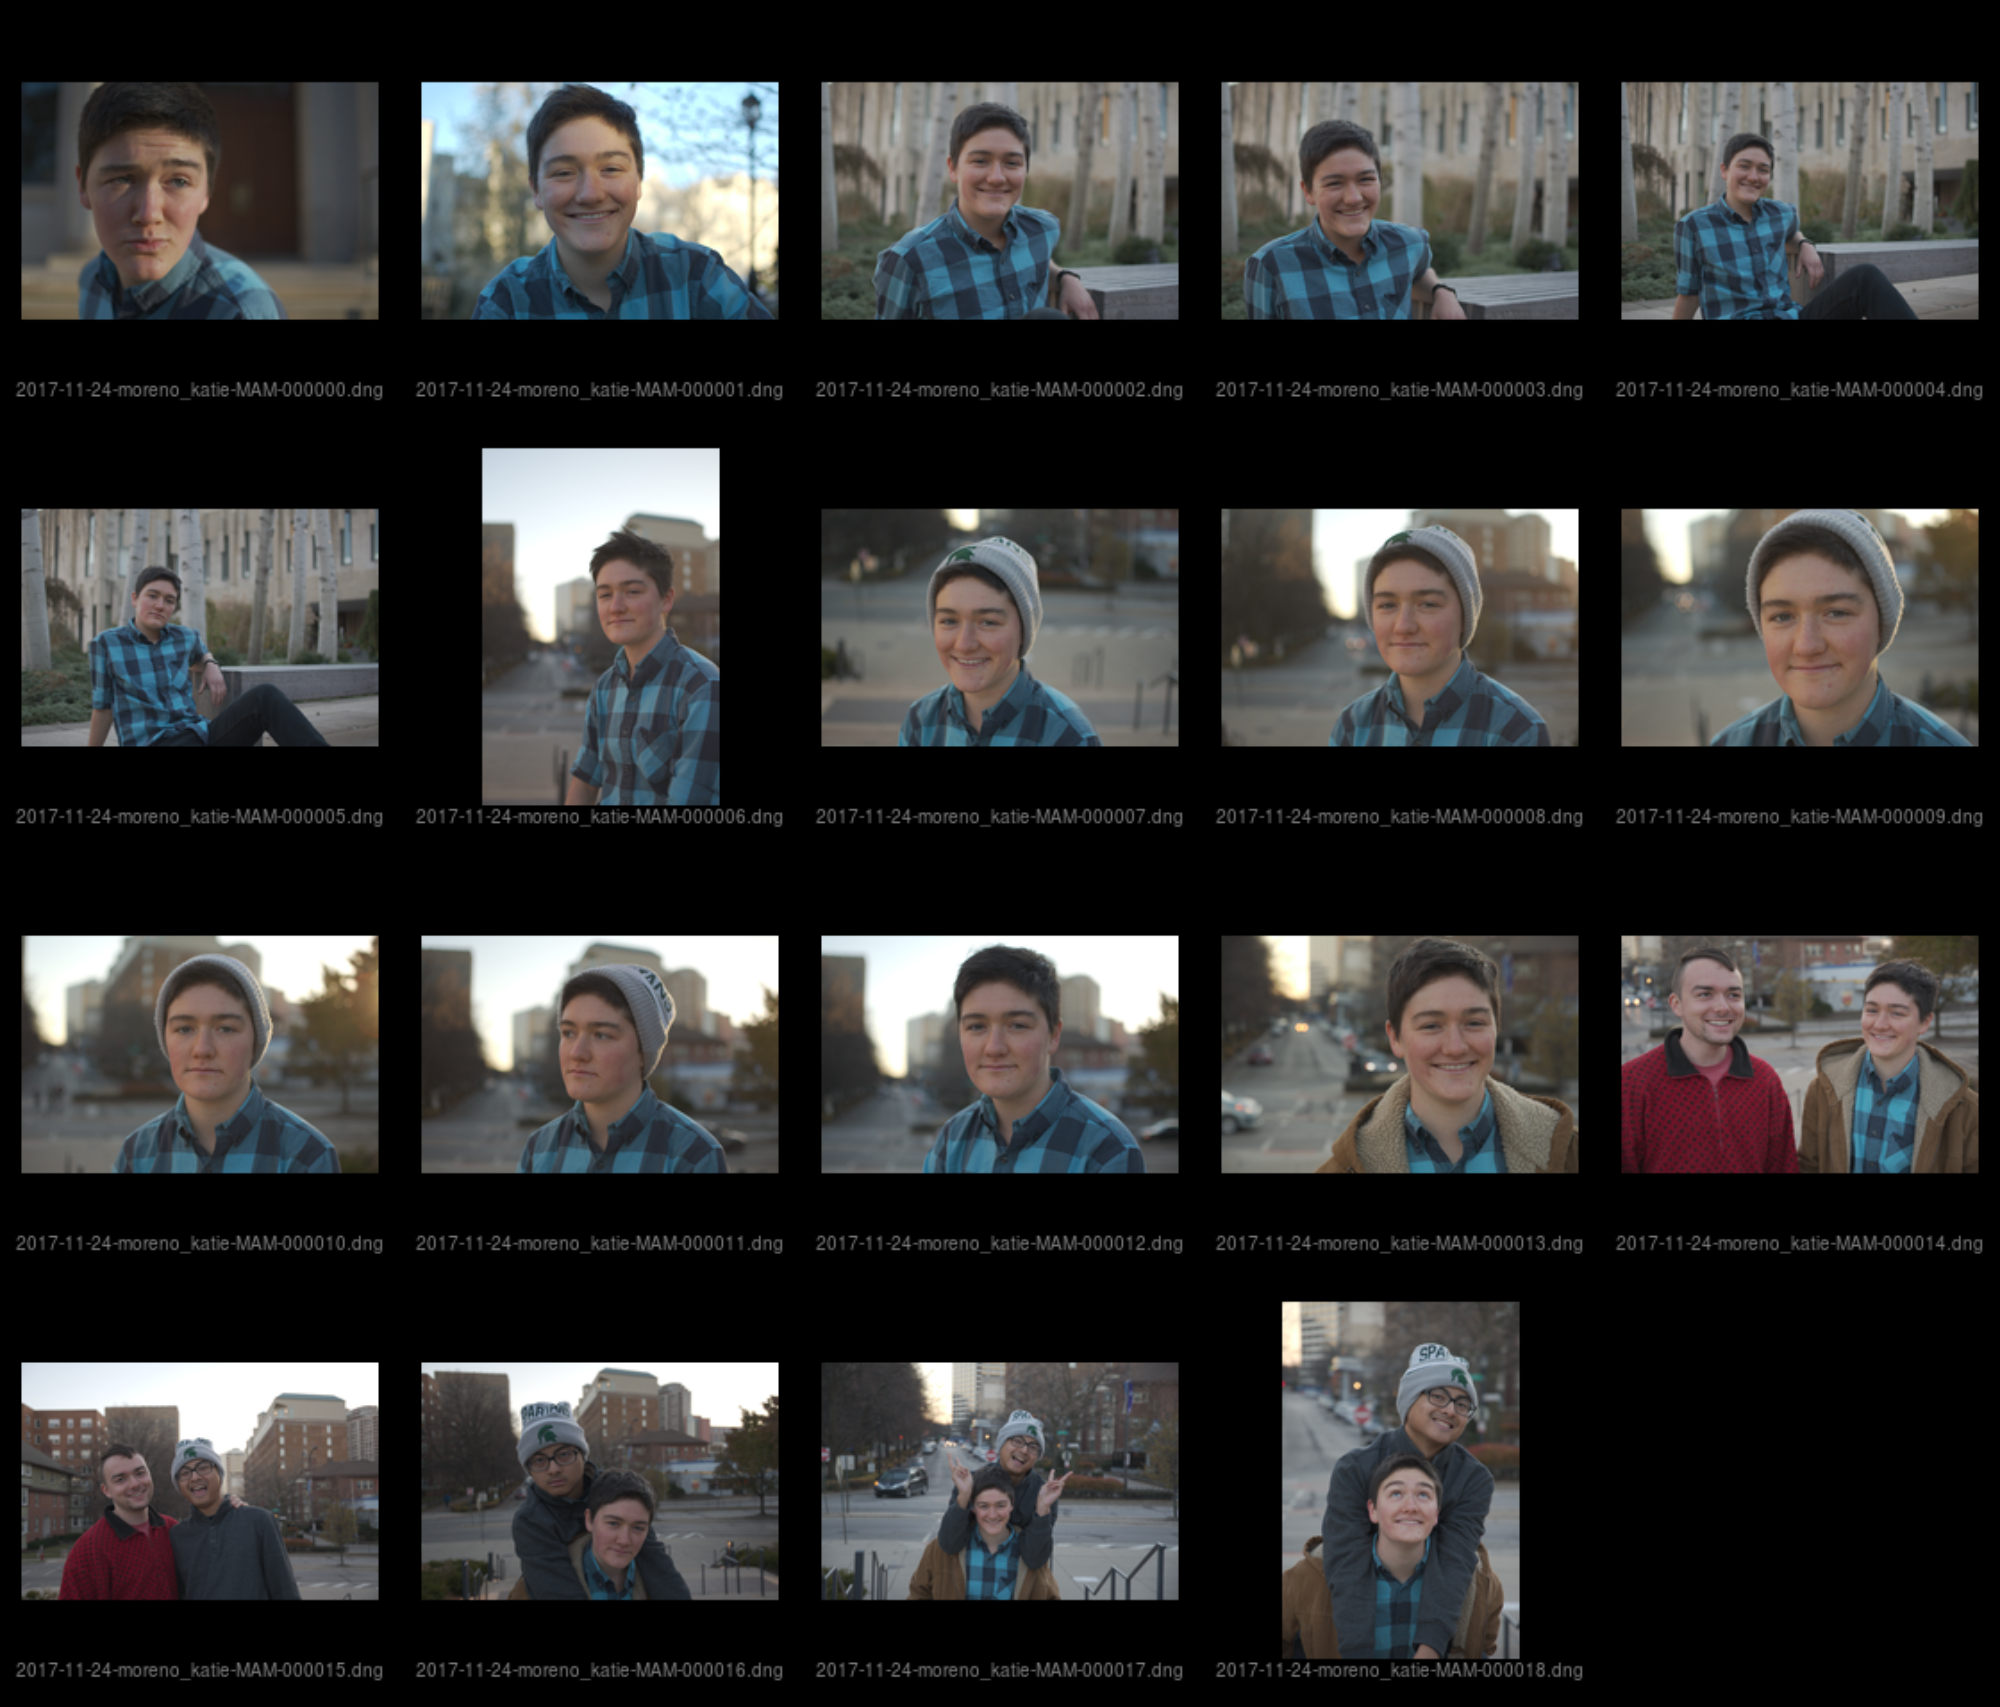
Here’s the Makefile I use.
.RECIPEPREFIX = >
IMAGEFILES = $(sort $(wildcard *.jpg) $(wildcard *.JPG) $(wildcard *.dng) $(wildcard *.DNG))

# get the basename of the containing directory
# this will be used to name the output document
BUILD_DIR := $(shell basename $(abspath $(dir $(lastword $(MAKEFILE_LIST)))))

all: contact-sheet.pdf $(BUILD_DIR)-csheet.pdf

contact-sheet.pdf:
> montage -verbose -label '%f' -font Helvetica -pointsize 10 -background '#000000' -fill 'gray' -colorspace sRGB -define jpeg:size=200x200 -geometry 200x200+12+12 -auto-orient -gamma 0.0 $(IMAGEFILES) contact-sheet.pdf

$(BUILD_DIR)-csheet.pdf: contact-sheet.pdf
> cp contact-sheet.pdf $(BUILD_DIR)-csheet.pdf

clean:
> rm contact-sheet.pdf $(BUILD_DIR)-csheet.pdf
I sometimes adjust the gamma value in the montage command to lighten RAW files that are displayed over-dark by the back end renderer.
Setting gamma to 1.0 corrects this issue.
I use templ to generate the above Makefile on the fly.
I keep a copy of all my contact sheets together elsewhere for easy reference.
Update:
I was continuing to run into trouble with over-dark rendering of RAW files and — especially for large jobs — excessive processing time and instability, so I switched to using dcraw to extract the pre-rendered .jpg bundled up in my .dng files instead of re-rendering via ufraw-batch.
(montage is an ImageMagick utility).
I made the switch by editing ImageMagick’s delegates.xml file (which you can find via locate delegates.xml).
Specifically, I rewrote the decode="dng:decode" entry as follows.
<delegate decode="dng:decode" command="dcraw -e -c %i | convert jpg:- %u.png"/>
This command uses dcraw to spit .jpg data through a pipe and into ImageMagick’s convert utility, which saves it out to a .png file.
Why exactly the output has to be in .png format and saved to the %u specifier (which is not the output specifier %o), I do not know.
Kevin Ludlow’s blog article and some ImageMagick documentation helped me eventually trial-and-error my way to this solution.
🔗 tar.gz
When each archive is complete, I store it as a tar.gz archive.
This lets me treat the archive like one big file, which is handy.
Importantly, it makes accidentally removing or modifying content in the archive difficult.
Maybe it provides a little compression, too.
🔗 Onsite Storage
I keep all my archives on two external hard drives: one at home and one at work.
🔗 Offsite Storage
In addition, I keep a copy of my archives in AWS Glacier. Paying other smarter, more careful people to protect your data and maintain the media it lives in is a good idea. Storing data in Glacier is pretty cheap. Getting data down from Glacier can be expensive, though, so I use Glacier as a final fallback.
Amazon doesn’t provide any official tools to upload large archives to Glacier. This has turned out to be a major inconvenience. It took me way too long poking around to finally find something simple that worked reliably.
import math
import boto3
from tqdm import tqdm
from botocore.utils import calculate_tree_hash
import os
import sys

assert (len(sys.argv) == 3), "bad arguments"

client = boto3.client('glacier')
vault_name = sys.argv[1]
local_file = sys.argv[2]
size = os.path.getsize(local_file) # in bytes
size_mb = size / (2**20) # Convert to megabytes for readability

multi_up = client.initiate_multipart_upload(vaultName=vault_name,
                                        archiveDescription=local_file,
                                        partSize=str(2**25)) # 32 mb in bytes
parts = math.ceil(size_mb / 32) # The number of <=32mb parts we need
with open(local_file, 'rb') as upload:
    for p in tqdm(range(parts)):
        # Calculate lower and upper bounds for the byte ranges. The last range
        # is now smaller than the ones that come before.
        lower = (p * (2**25))
        upper = (((p + 1) * (2**25)) - 1) if (p + 1 < parts) else (size-1)
        read_size = upper-lower+1
        file_part = upload.read(read_size)
        up_part = client.upload_multipart_part(vaultName=vault_name,
                                           uploadId=multi_up['uploadId'],
                                           range='bytes {}-{}/*'.format(lower, upper),
                                           body=file_part)

with open(local_file, 'rb') as upload:
    checksum = calculate_tree_hash(upload)
    complete_up = client.complete_multipart_upload(archiveSize=str(size),
                                                   checksum=checksum,
                                                   uploadId=multi_up['uploadId'],
                                                   vaultName=vault_name)
    print(complete_up)
I wrote a little tool to check an AWS archive inventory against your local files to make sure everything is stored away properly. I use it intermittently to double check that my newest archives have been frozen away in Glacier successfully.
Paul Heinlein’s blog has been very helpful RE: AWS command line Glacier interface miscellany.
🔗 Edit
I do all of my photo edits on my iPad.
There are good, free tools for editing and publishing available.
On the downside, getting raw photos on and edited photos off the iPad is more difficult than it should be.
Right now, I use Google Drive to accomplish my file transfers.
(Update: now that I do my culling on the iPad and get photos off the iPad directly to my laptop via ifuse, no cloud intermediaries are necessary.)
I use Google Snapseed for most edits. On occasion, I’ll open up Lightroom for its free noise-reduction capabilities.
🔗 Publish
I publish my photos through Instagram. When I post on Instagram, I always share to tumblr. I really like tumblr as a photo blog platform. I use IFTTT to tweet my Instagram photos, too.
Hashtags on Instagram are a pain. You can speed everything way up by keeping ready-to-go sets of tags as text shortcuts on iOS. I’ve found the best way to collect appropriate hashtags is to copy them from other likeminded Instagrammers. The native twitter app doesn’t allow copy/paste, but you can circumvent this by opening their web viewer.
🔗 Business cards
Sometimes, passersby see you with a camera that has a lens hood, remember that they or their company need photos taken, and ask you for a business card. This should be a good-enough reason to carry some around.
I had some printed by Moo. It was a little spendy, but they were able to print a different image on the back of each card — which is awesome.
Here’s an example proof they sent me.

I used LaTeX to format the business side of my business card. You can find the source here.
🔗 Website
If you hand out business cards, you should have a nice website. I find Jekyll + github.io to be a great solution. It costs $0.
To get the website I wanted, I wrote a bit of custom code myself and pulled in code from other people. You can find the full source for my site on GitHub. For your enjoyment, I’ve pasted in the HTML/javascript that powers the randomly selected image that appears on my homepage.
If you want to get started with Jekyll and github.io, check out this tutorial.
🔗 Printing
I’ve ordered framed prints through FrameBridge and canvas prints through CanvasChamp. I’ve had good experiences with both. CanvasChamp, in particular, can be a great deal if you play their system right. I usually pay just a little over $20 for an 18in by 12in print.
HMU for a referral code to either.
🔗 Reading and Viewing Material
Miscellaneous videos on youtube:
- The 7 Best Nikon Tricks Ever! by Steve Perry
- Back-Button Focus by Tony and Chelsea Northrup
- D7200 Overview Training Tutorial by Tony and Chelsea Northrup
- Tony and Chelsea Northrup have a lot of other good how-to videos.
At one point, I sat around scratching my head looking for a service that would let me easily curate a collection of photographic inspirations. Then, I realized I was exactly describing Pinterest. So I got one. It’s pretty useful.
I really enjoyed PBS’s American Experience documentary on Ansel Adams. Since, I am glad to have discovered Adams’ excellent pedagogical writing on photography. Even if you don’t use film, reading Ansel Adams is a good investment of your time. His writing hits top marks technically. Plus, it’s just good writing. I particularly enjoyed Examples: The Making of 40 Photographs.
🔗 Let’s Chat
I would love to hear your thoughts on my photo workflow or your photo workflow or other photo topics !!
I started a twitter thread (right below) so we can chat ![]()
![]()
![]()
🔌plugging a blog on my 📸 workflow...
— Matthew Andres Moreno (@mmore500) November 15, 2018
* accessories💄
* raspberry pi SD card backup bot🤖
* iPad-based cull & edit 📱
* transfer files iPad ➡️ linux🐧
* organize & archive🗄️💾
* AWS glacier❄️
* how to make contact sheets🖼️
& more✨
✅ it out !https://t.co/PN6aVT4tEW
Pop on there and drop me a line ![]() , make a comment
, make a comment ![]() , or leave your own tips & tricks
, or leave your own tips & tricks ![]()